How to set the fulfillment location on a sales order
Do you manage multiple locations in inFlow? This guide will show you how to select a fulfillment location for your products when creating a sales order.
Please note: multiple locations are only available on select plans or add-ons.
Web
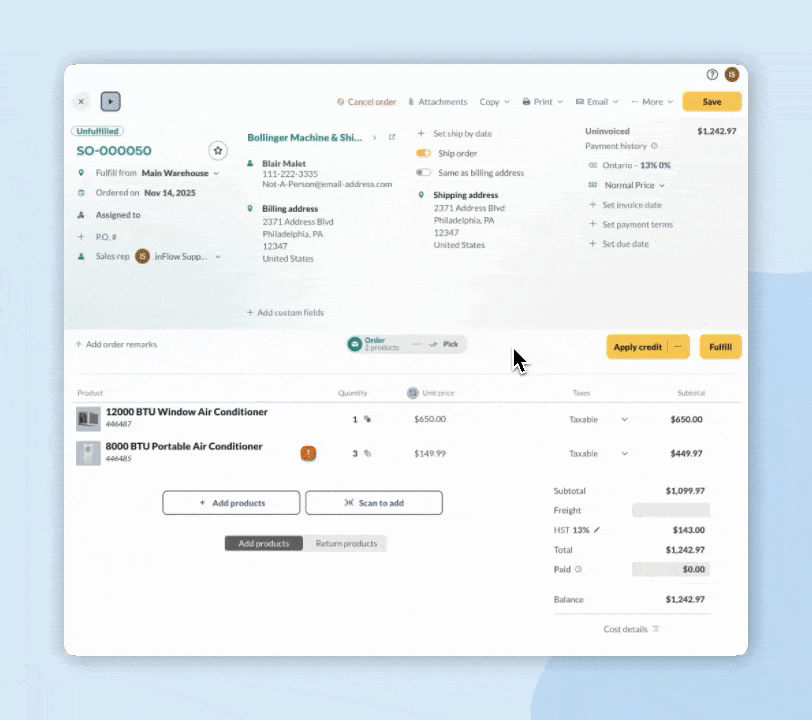
Sales order location settings
When you create a sales order, the Location field prefills based on the customer’s default location settings, your personal default location, or the system default location. You can learn about how to set the default locations in this article.
Click on the location to select another fulfillment location for the sales order.

If you run out of stock at the location set on the sales order, you’ll see an exclamation mark beside your product’s quantity.
Even if you have enough stock across all locations, the exclamation mark applies only to the inventory at the specific location on the sales order.
In the screenshot below, you can see an example of a situation where there isn’t enough stock at the Main Warehouse location.
Picking/fulfilling from multiple locations for the same order
If needed, you can fulfill products from multiple locations in the Pick tab.
- On the sales order, select the Pick tab.
- Click on the ellipsis next to the product, then Edit location.
- Select the Location and Sublocation (if needed).
- Click Save to return to the Pick tab.
Transferring stock
Alternatively, instead of having the order show two different locations on the Fulfill tab/Pick list, you can do a stock transfer to transfer the product from other locations to the location on the sales order.
When you’ve received the products in the stock transfer, only then would you go to the order and fulfill the sale.
This information applies to the purchasing side as well, on the Receive tab (instead of a Fulfill tab).
Windows
Sales order location settings
When you create a sales order, the Location field prefills based on the customer’s default location settings, your personal default location, or the system default location. You can learn about how to set the default locations in this article.
By default, if you don’t actively select a location, the Location field will automatically use your customer’s default location. You can control this in the sales order by specifying the location of the sales order or the item in the Fulfill tab.
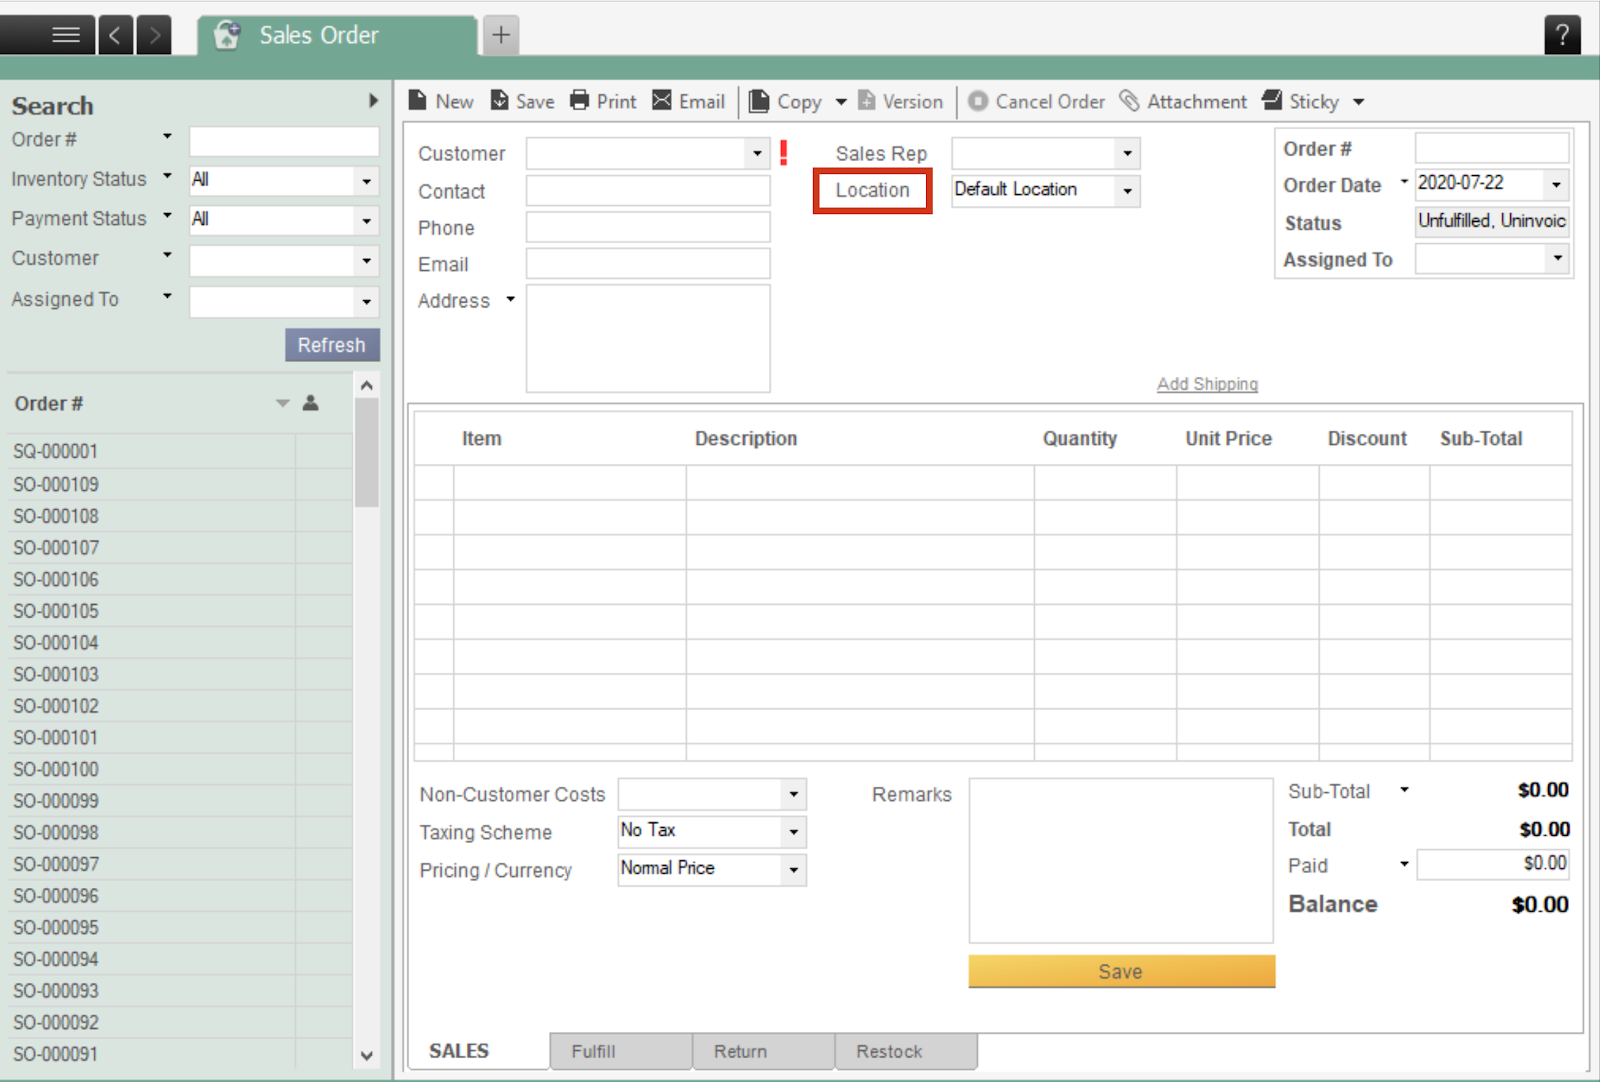
If you remove the Location from the order, inFlow will use the locations based on the Picking options set up in the Inventory settings in inFlow for the Web.
However, sometimes you may run out of stock at the location to fulfill your order. This is indicated by an exclamation mark beside your product’s quantity.
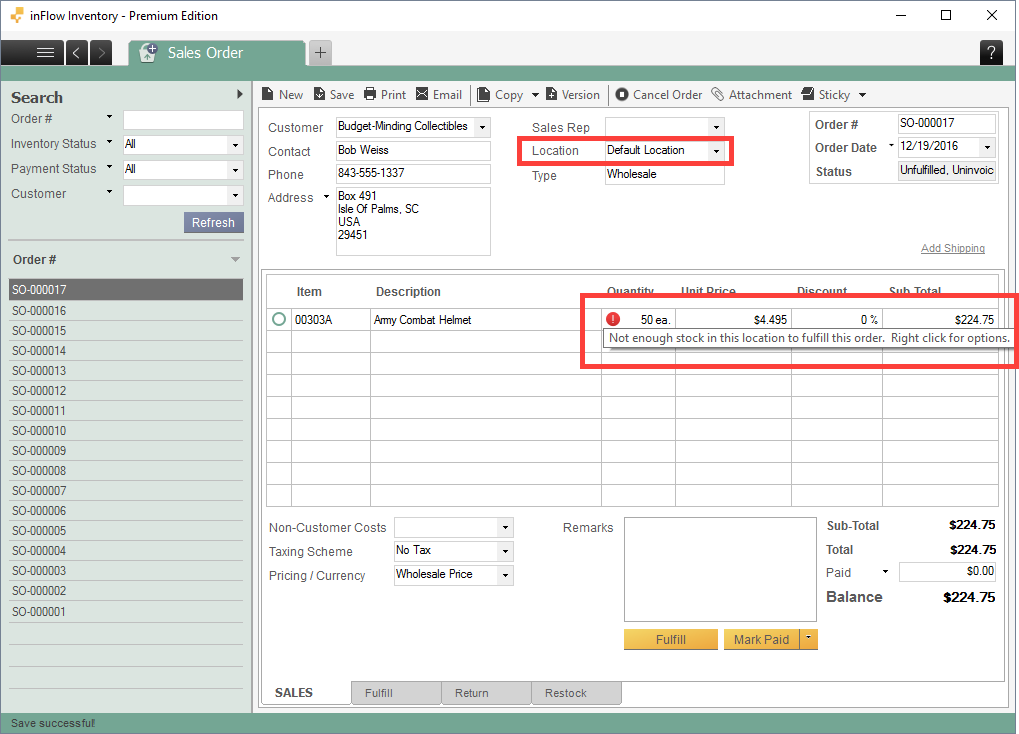
Even if you have enough stock on hand across all locations, that exclamation mark applies only to a single location. The above screenshot shows that there’s not enough stock in the location specified Default Location.
Picking/fulfilling from multiple locations for the same order
To get inFlow to use a combination of locations, click the Fulfill tab (or Pick tab if you’re in shipping mode). Click Auto Fill, then click the Location for that product. It will show you a drop-down of all the locations you have and the quantities for that product.
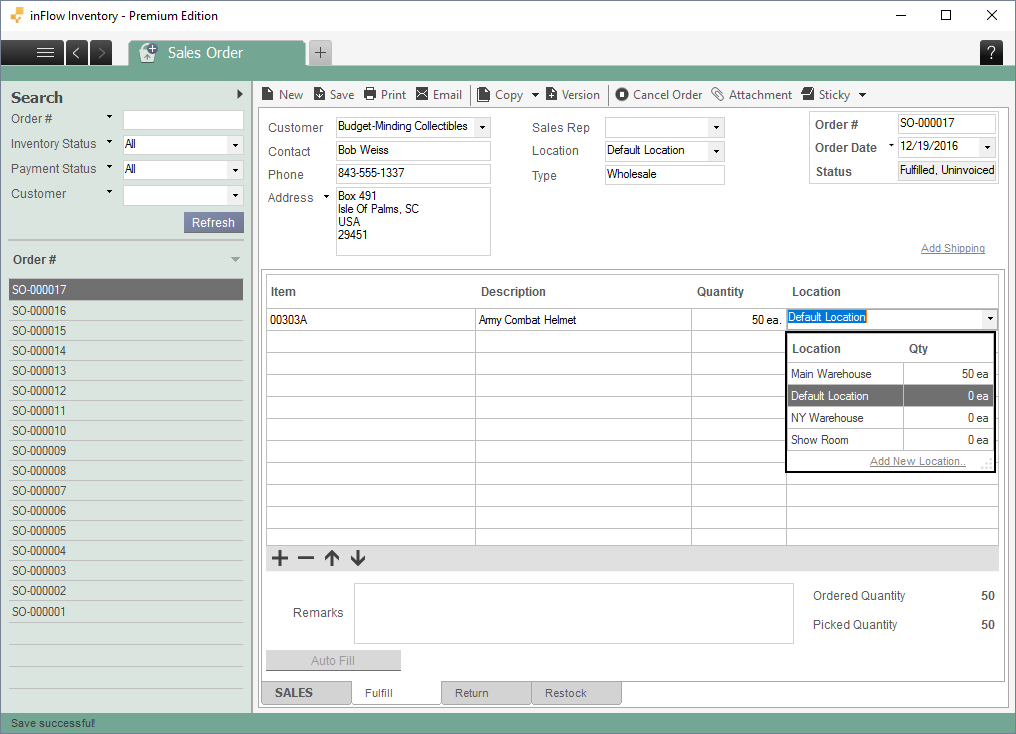
Decide which location you want to fill in the remainder, and add it as a new line. You will also have to adjust the quantity for the first location.
Transferring stock
Alternatively, instead of having the order show two different locations on the Fulfill tab/Pick list, you can do a stock transfer to transfer the product from other locations to the location on the sales order. When you’ve received the products in the stock transfer, only then would you go to the order and fulfill the sale.
This information applies to the purchasing side as well, on the Receive tab (instead of a Fulfill tab).


0 Comments